
How to Setup Google Ads Conversion Tracking for Shopify with Google Tag Manager (GTM)
Are your Google Ads campaigns burning through cash without clear results? If you run a Shopify store, getting accurate purchase conversion data into Google Ads is crucial for optimizing your campaigns and maximizing your Return on Ad Spend (ROAS). Many businesses struggle with this complex setup, leading to wasted ad budgets and missed growth opportunities.
This comprehensive guide will walk you through the entire process of setting up Google Ads Purchase Conversion Tracking for your Shopify store using Google Tag Manager (GTM). Whether you’re a beginner or need a refresher, follow these step-by-step instructions to ensure every purchase is accurately tracked, giving you the power to scale your ads profitably.
Why Accurate Google Ads Conversion Tracking is Critical for Shopify
Before diving into the setup, understand why this is non-negotiable for your Shopify success. Accurate tracking empowers you to…
- Optimize bids for actual purchases.
- Improve campaign targeting and retargeting.
- Calculate true ROAS and CPA.
- Scale profitable campaigns with confidence.
Prerequisites: What You Need Before You Start
- An active Google Ads account.
- A Shopify store.
- A Google Tag Manager (GTM) container linked to your Shopify store.
- Basic understanding of HTML (for data layer snippets).
Step-by-Step Guide: Setting Up Google Ads Purchase Tracking
Step 1: Create a Google Ads Conversion Action
First, log into your Google Ads account and navigate to Tools and Settings > Conversions. Click the plus button to add a new conversion.
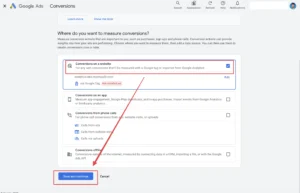
Select ‘Website’ as your conversion source.
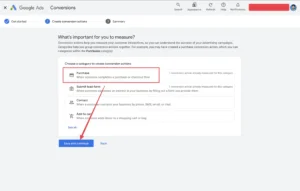
Choose ‘Purchase’ as the category.
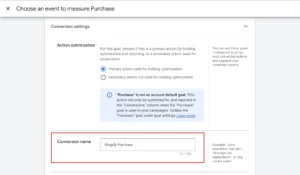
Assign a conversion name (e.g., ‘Shopify Purchase’).
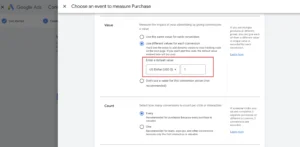
Select ‘Use different values for each conversion’ and set a default value.
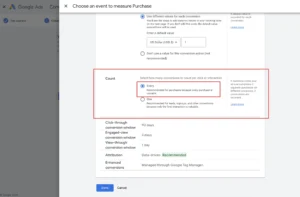
Choose ‘Every’ as the count.
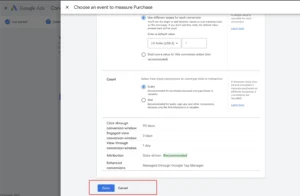
Continue with all (Google Ads settings).
Step 2: Link Google Tag Manager to Your Shopify Store
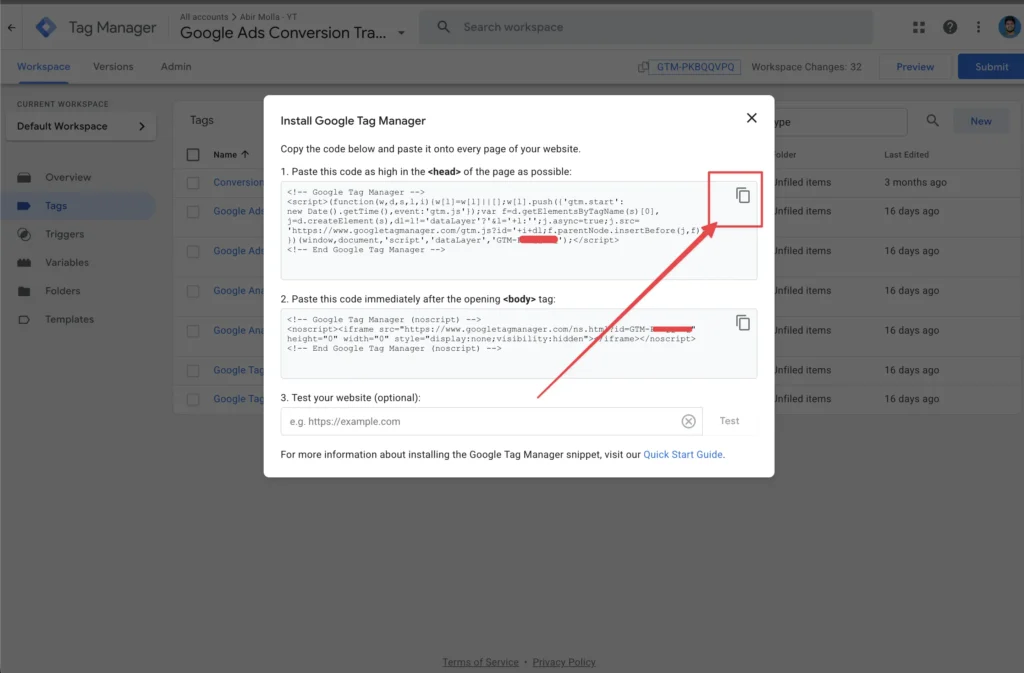
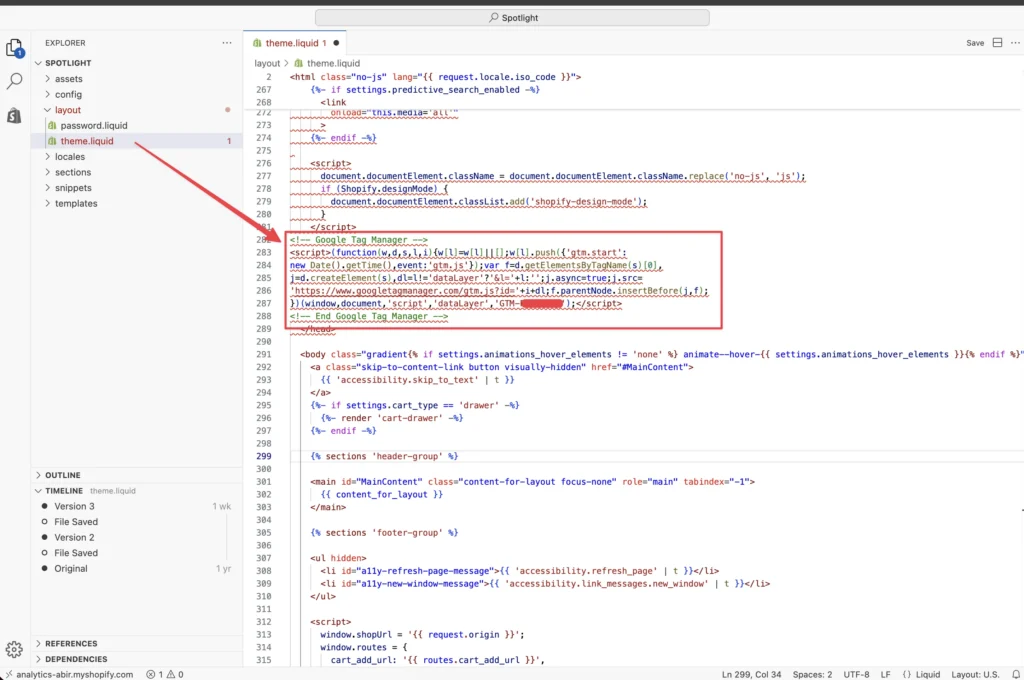
If you haven’t already, ensure your GTM container is correctly integrated with your Shopify store. This involves adding the GTM code snippets to your Shopify theme.
How to get “GTM” code snippets.
Where to paste them in Shopify’s theme.liquid file.
Step 3: Add Data Layer Code to Shopify for Transaction Details
To capture dynamic values like purchase value, currency, and transaction ID, we need to push them into the data layer on Shopify’s ‘Order Status Page’.
Navigate to Shopify Admin > Settings > Customer events > Add custom pixel.
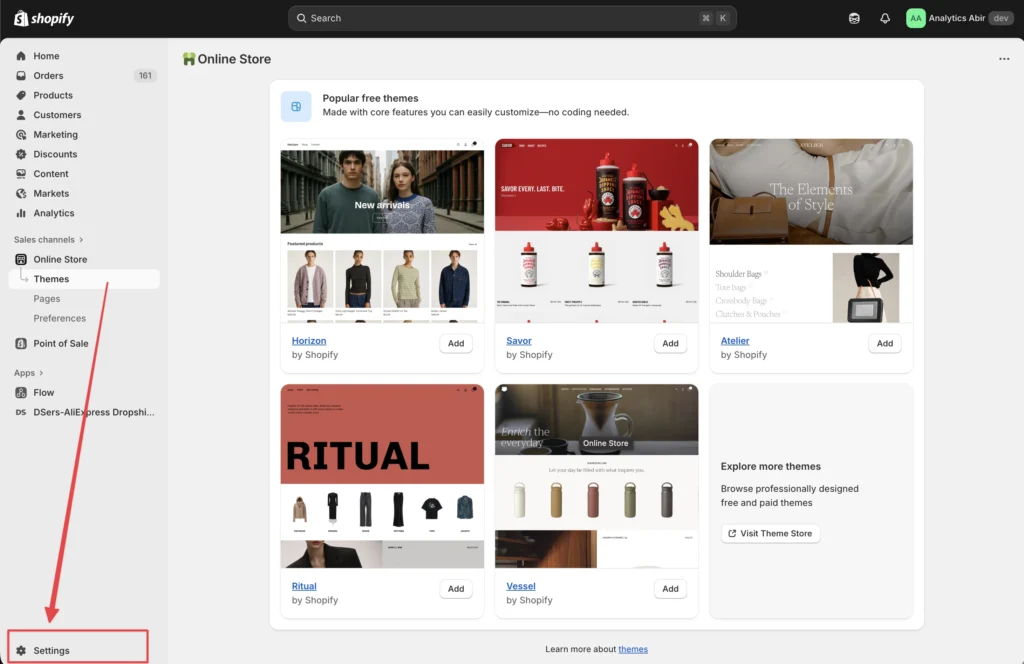
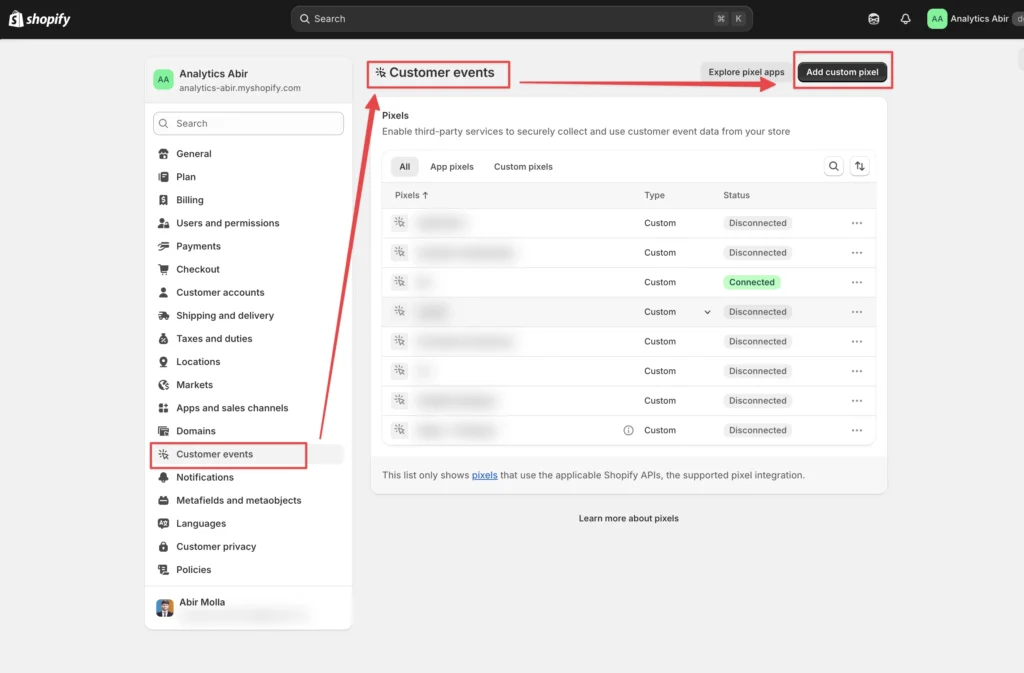
How to enable Shopify Data layer.
Here is the Shopify data layer code
Step 4: Create GTM Variables for Purchase Data
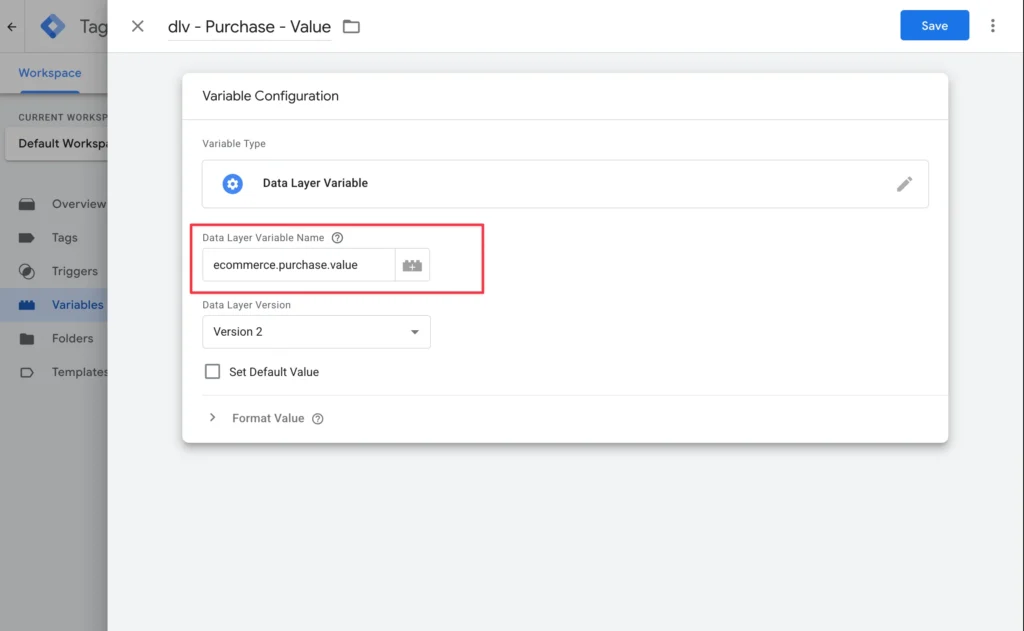
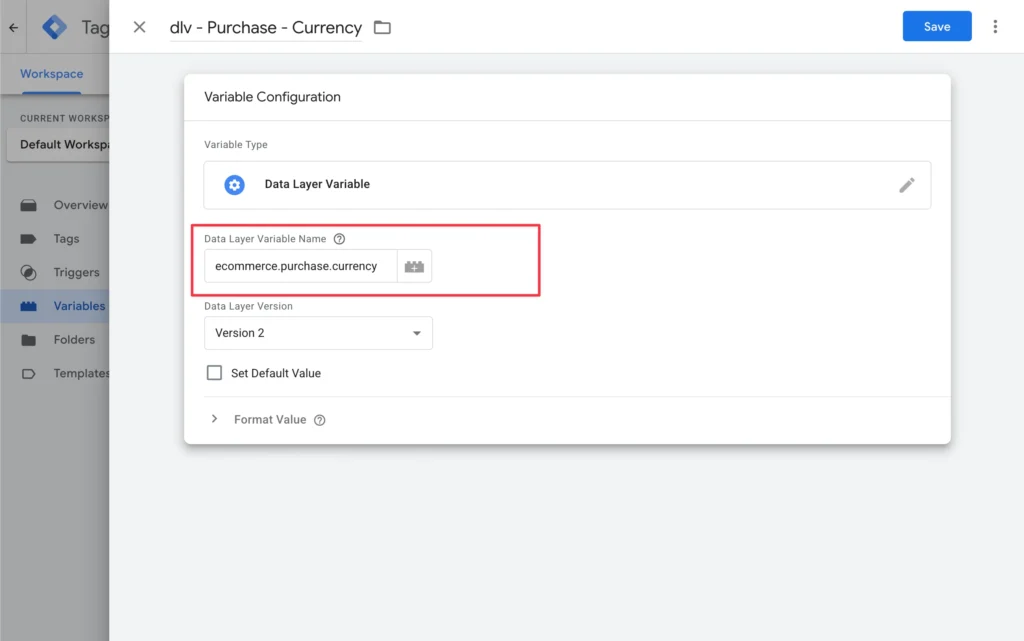
Now, in GTM, we’ll create Data Layer Variables to extract the purchase information we pushed into the data layer.
Create a Data Layer Variable for ‘ecommerce.purchase.value’.
Create a Data Layer Variable for ‘ecommerce.purchase.currency’.
Create a Data Layer Variable for ‘ecommerce.purchase.transaction_id’.
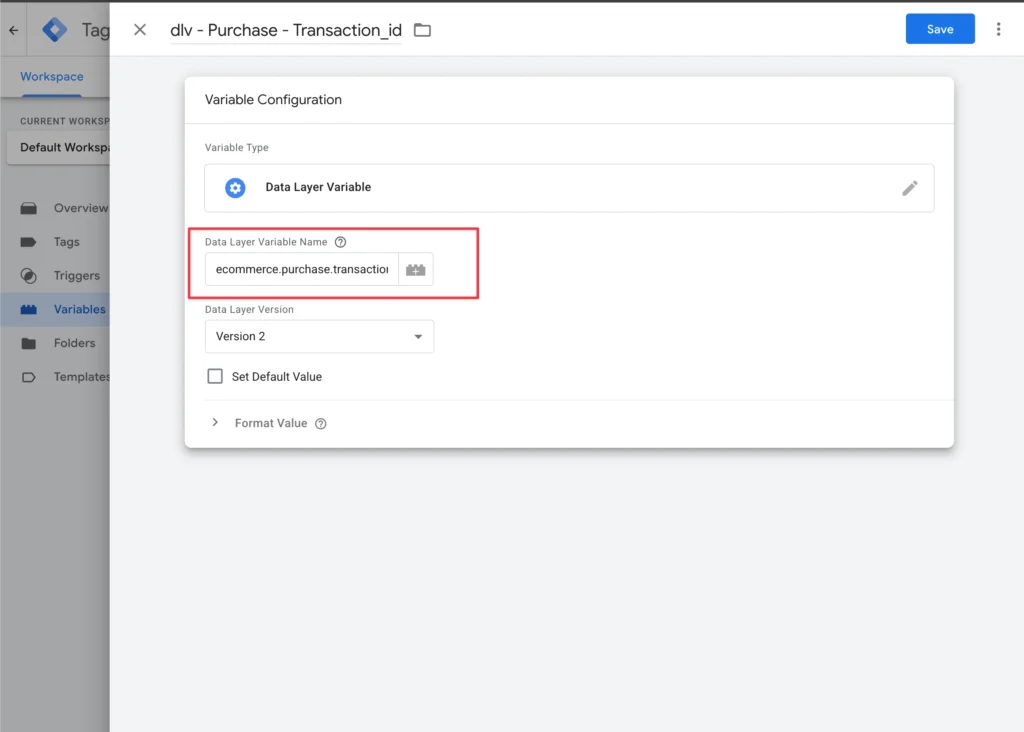
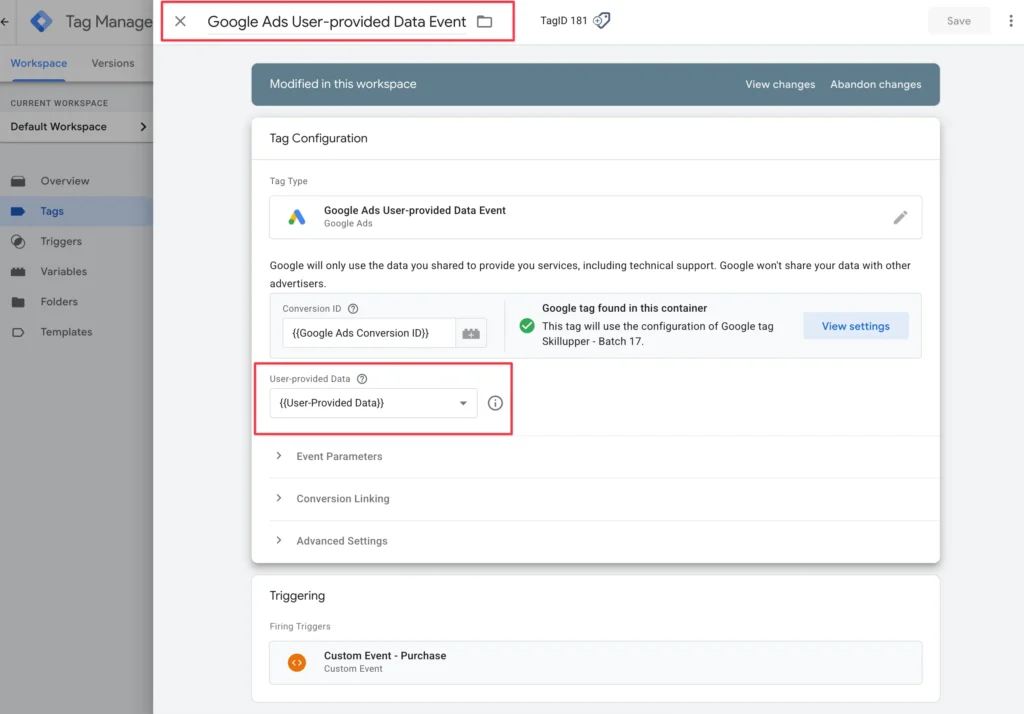
Create a User-Defined Variable for ‘user_id’ (for Enhanced Conversions, if applicable).
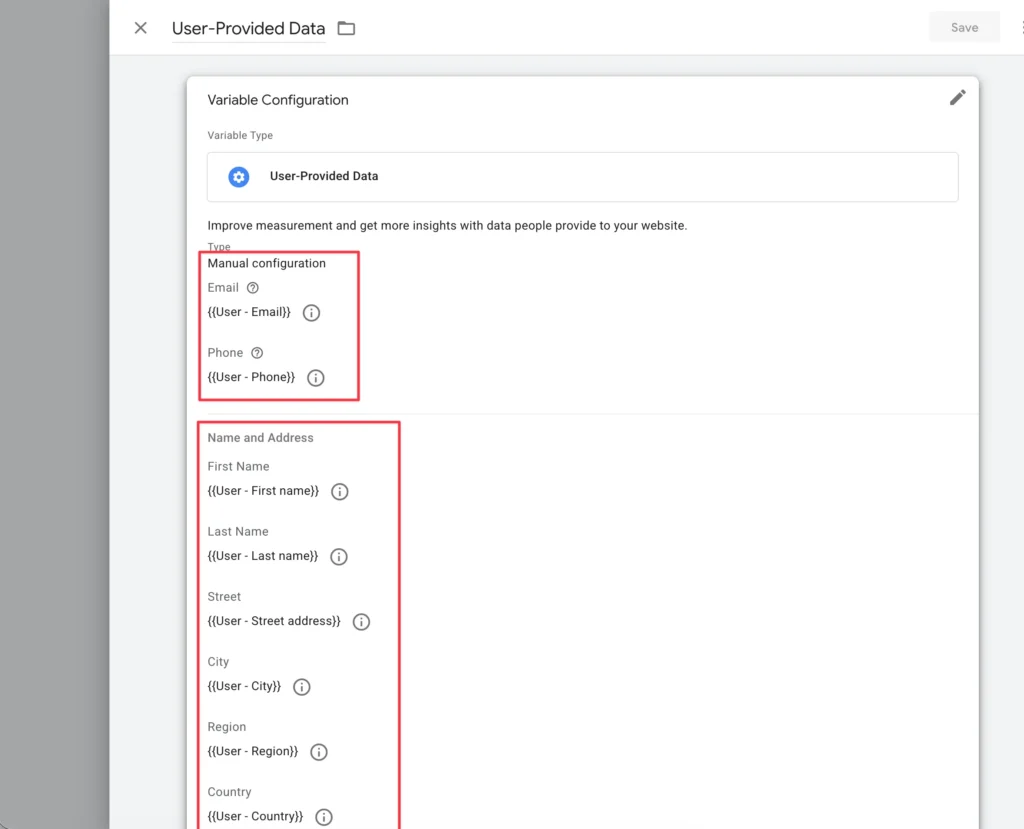
Step 5: Set Up the Google Ads Conversion Tracking Tag in GTM
With the variables ready, we can now configure the Google Ads Conversion Tracking tag in GTM.
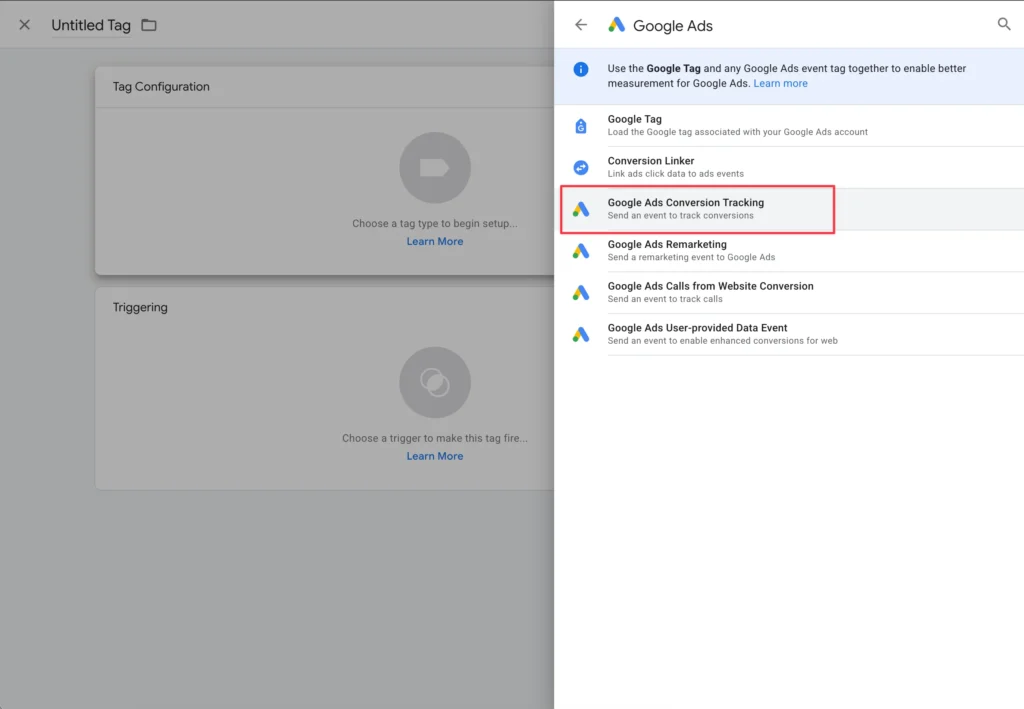
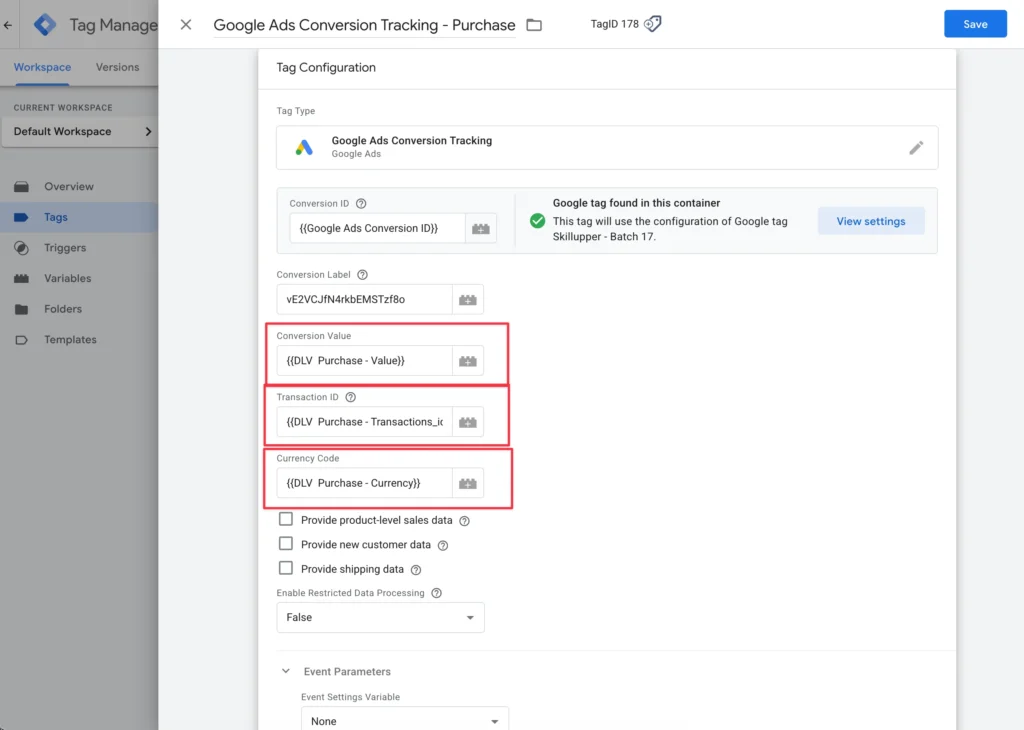
Create a new Tag > Tag Configuration > Google Ads Conversion Tracking.
Enter your Conversion ID and Conversion Label (from Google Ads).
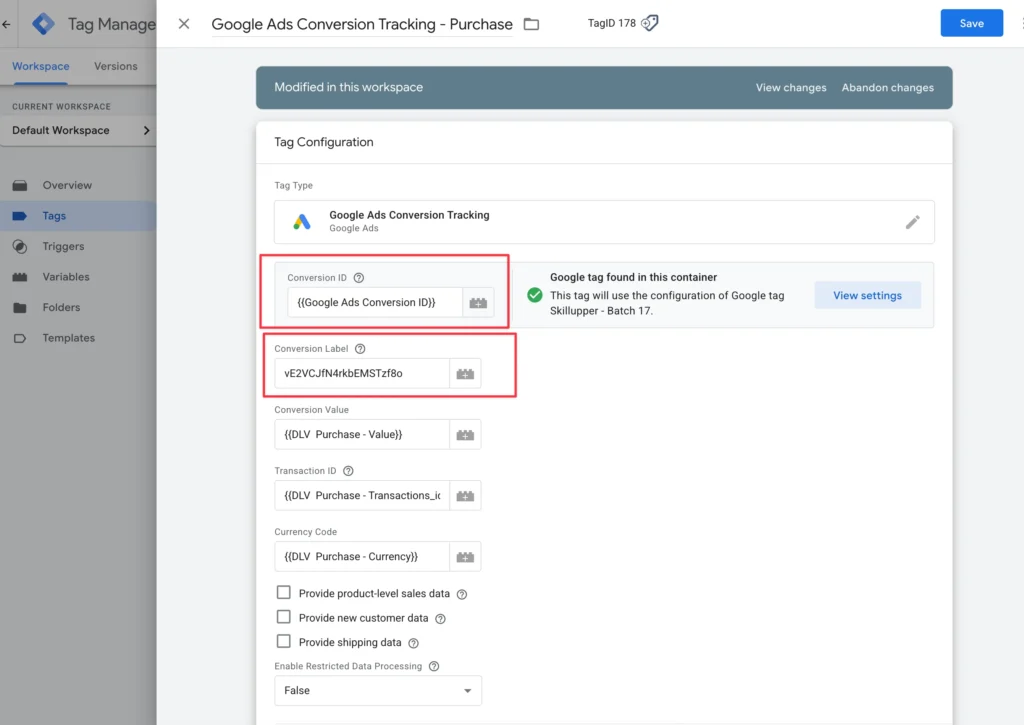
Map your GTM Variables to the ‘Conversion Value’, ‘Currency Code’, and ‘Transaction ID’ fields.
Configure Enhanced Conversions if desired (mapping user parameters).
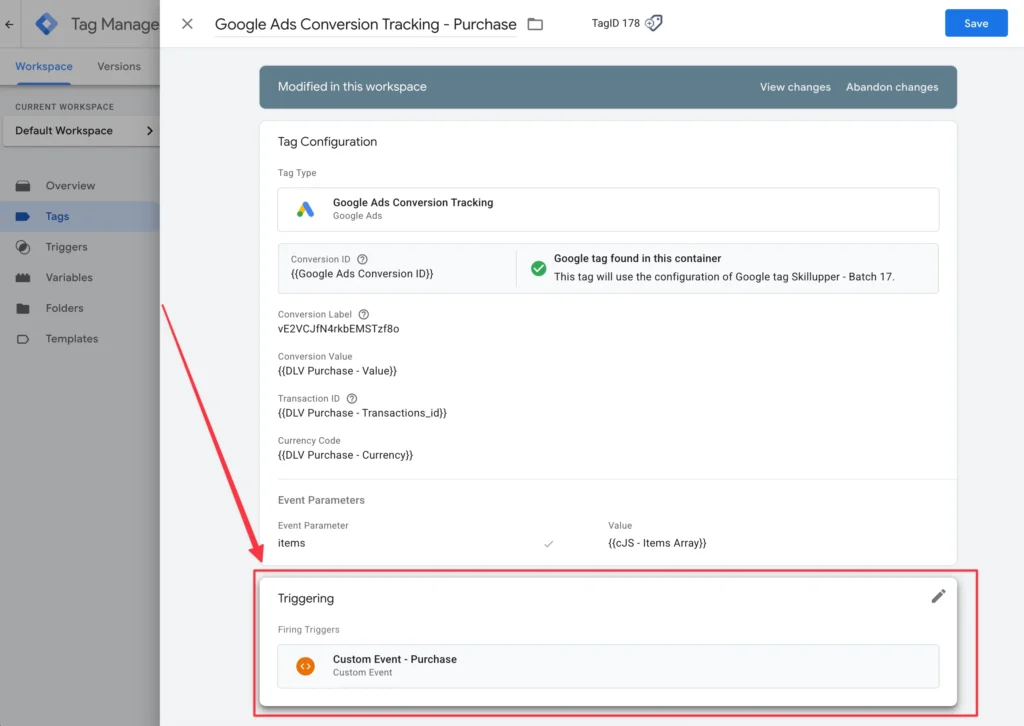
Set the Trigger to a custom event that fires on the ‘purchase’ (data layer event).
Step 6: Test and Publish Your GTM Container
Testing is crucial to ensure everything is working correctly before publishing.
Use GTM’s Preview Mode.
Simulate a purchase on your Shopify store.
Verify the Google Ads Conversion Linker tag and Google Ads Conversion Tracking tag fire correctly.
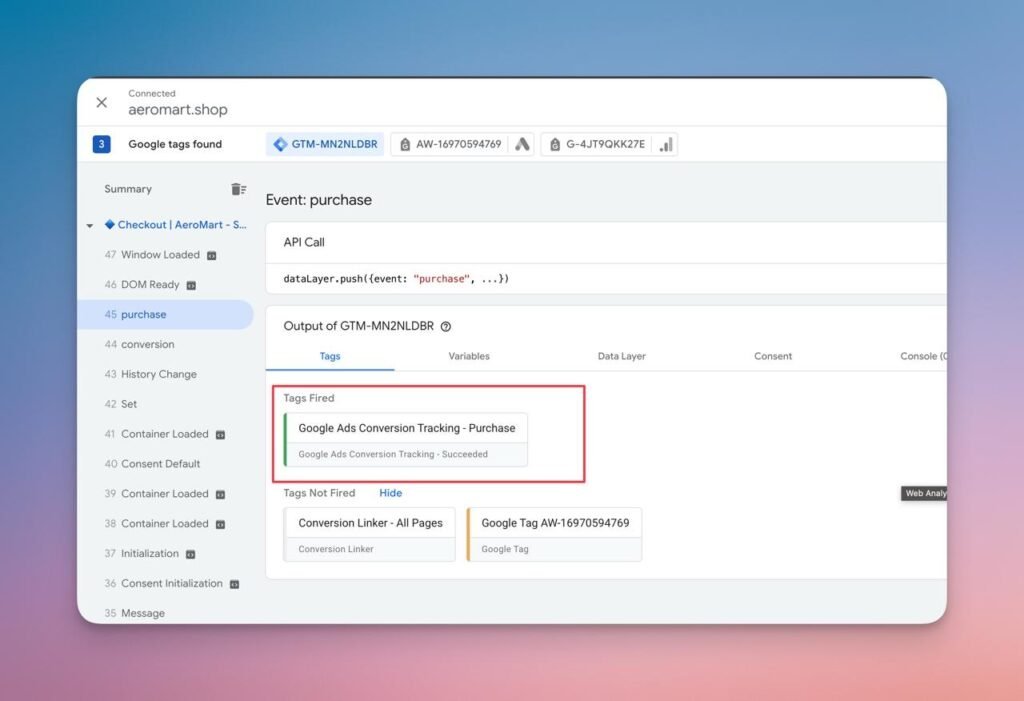
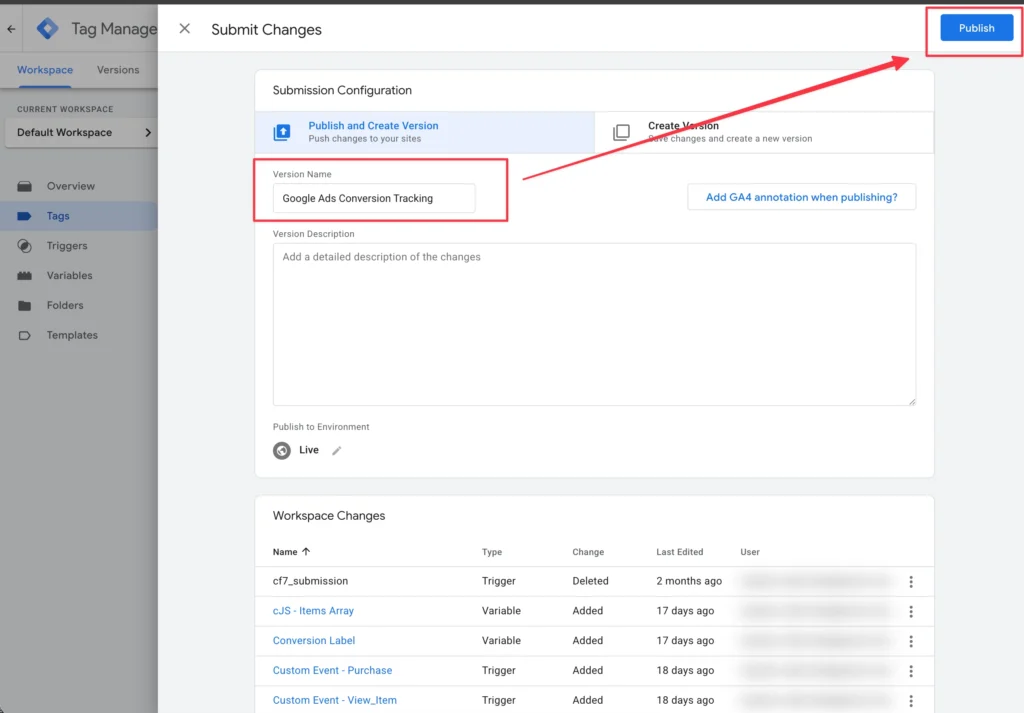
Once confirmed, Publish your GTM container.
Still unsure if your Shopify tracking is 100% accurate?
Don’t let hidden data issues drain your ad budget. As an ROI-Driven eCommerce Tracking Specialist, I help store owners like you fix data discrepancies and unlock profitable growth. Let me personally review your Google Ads, GA4, and Facebook CAPI setup to identify exactly where you’re losing money.
(This is a limited-time offer for serious eCommerce businesses looking to scale. No pressure, just clear, actionable insights to boost your ROI.)
Click Here to Book Your FREE, No-Obligation Tracking Audit Now